|
|
Post by eagle on Mar 15, 2013 21:33:09 GMT -5
There are four methods available for putting an Avatar into your profile. 1. Upload an Image to your Profile Image from your computer: Profile > Edit Profile > Upload Link > Select Image > Open > Save Avatar Changes Image linked via internet
(Your own from an image hosting site or with permission or free non-copyrighted image): Profile > Edit Profile > Upload Link > Link Image > Save Avatar Changes 2. Use ProBoards Avatar Creator Profile>Edit Profile>Edit Avatar>Save Avatar> Save Avatar Changes 3. Combination of Uploaded Image as background for the ProBoards Avatar you design yourself
Profile>Edit Profile>Edit Avatar>Save Avatar > Combine them > Save Avatar Changes 4. Use a Forum Avatar
Profile>Edit Profile> Pick One (Forum Avatar) > Save Avatar Changes
5. When you first join, "No Avatar" is selected, which automatically assigns the default avatar for our forum.
Illustrated instructions for each method appear below (in subsequent posts).
|
|
|
|
Post by eagle on Mar 15, 2013 21:34:02 GMT -5
1. Upload an Image to your Profile Image from your computer: Profile > Edit Profile > Upload Link > Select Image > Open > Save Avatar Changes Open Profile  Edit Profile 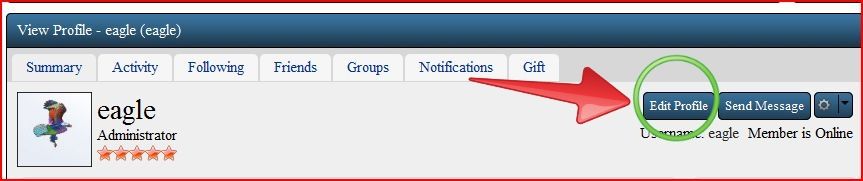 Upload Link 1. Select the circle to the left of "Use only the Uploaded/Linked" 2. Select hyperlink "Upload/Link" 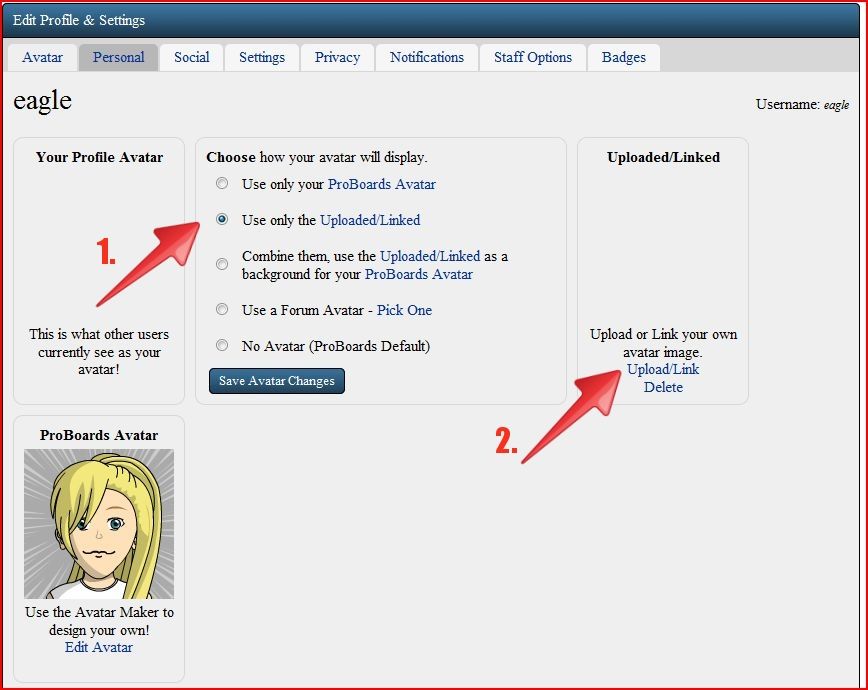 Select Image (from your computer) 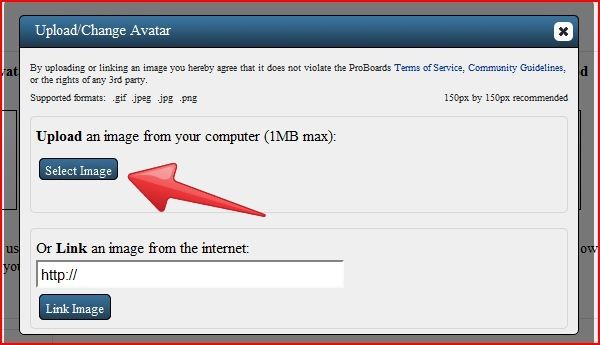 Choose a file (size limit = 1MB or less) from your computer 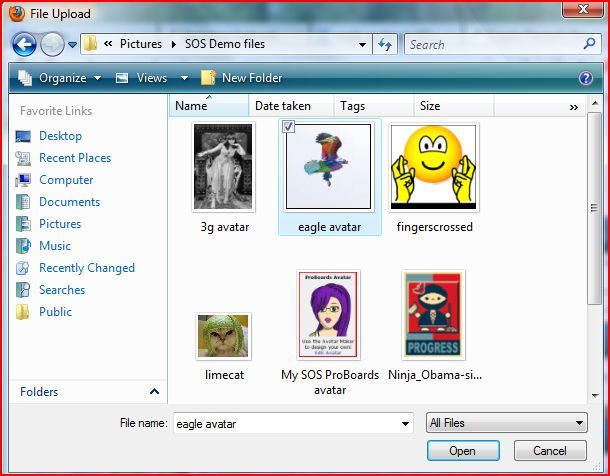 Wait for file to upload  Save Avatar Changes 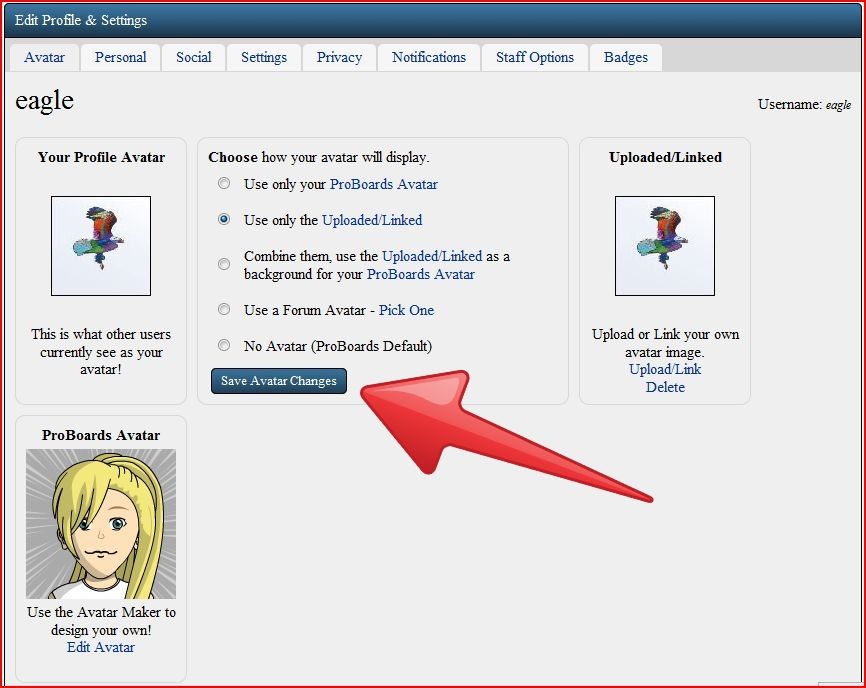 |
|
|
|
Post by eagle on Mar 15, 2013 21:34:40 GMT -5
1. Upload an Image to your Profile Image linked via internet (Your own from an image hosting site or with permission or free non-copyrighted image) Profile > Edit Profile > Upload Link > Link Image > Save Avatar Changes Image files uploaded from Internet sources need to be free of copyright restrictions, with permission from the copyright holder, or your own property. You can link to your own images from an Image Hosting Site, such as Flickr or Photobucket, etc. 1. Choose an image. 2. Copy the URL (link) for the Image file you have selected from the Internet. Below is an example of selecting an Image from a Photobucket file: 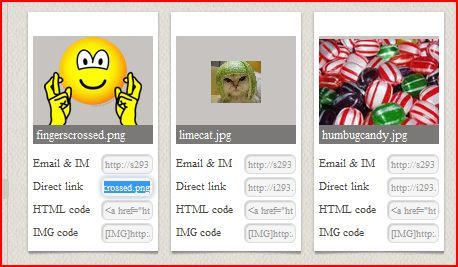 3. Paste the copied URL (Link) into the "Link image from the internet" box in the Upload Change Avatar menu box as shown below: (Follow the first three steps in the above Instructions, which brings you to the Upload Change Avatar menu box below) 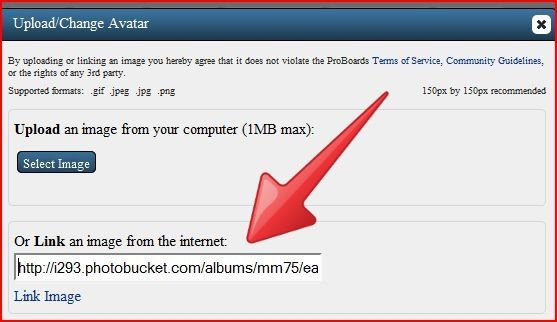 4. Save Avatar Changes 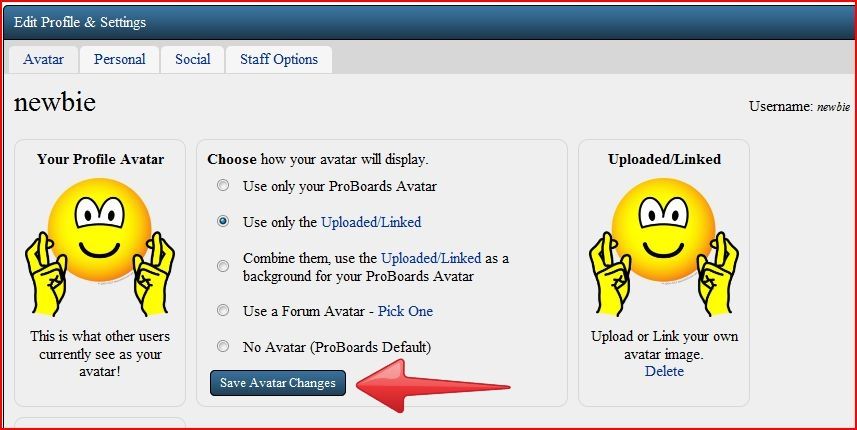 |
|
|
|
Post by eagle on Mar 16, 2013 0:43:15 GMT -5
2. Use ProBoards Avatar Creator Profile>Edit Profile>Edit Avatar>Save Avatar> Save Avatar Changes
From the Edit Profile menu, choose Edit Avatar 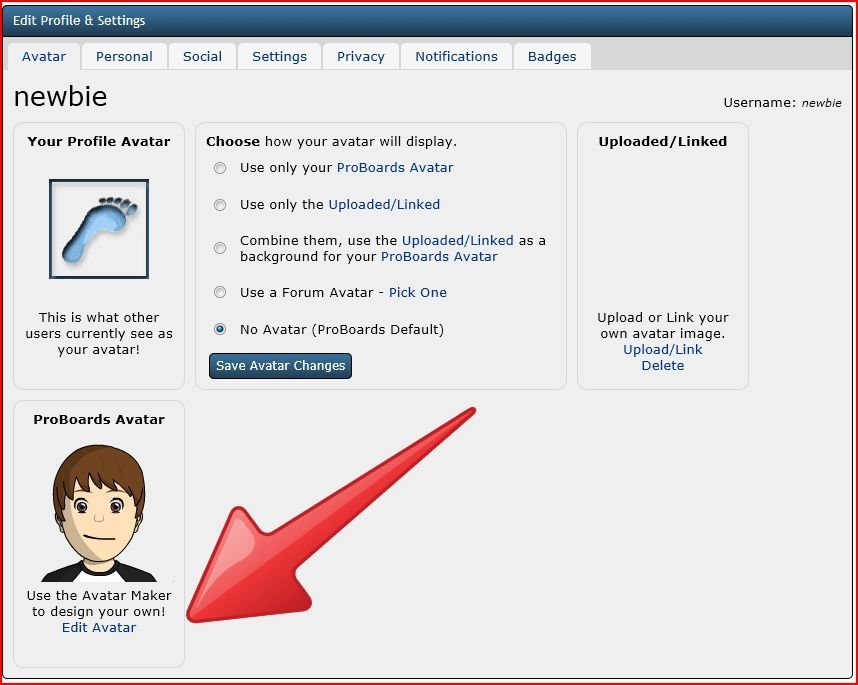 When you open the Avatar Maker, animated Instruction video starts. 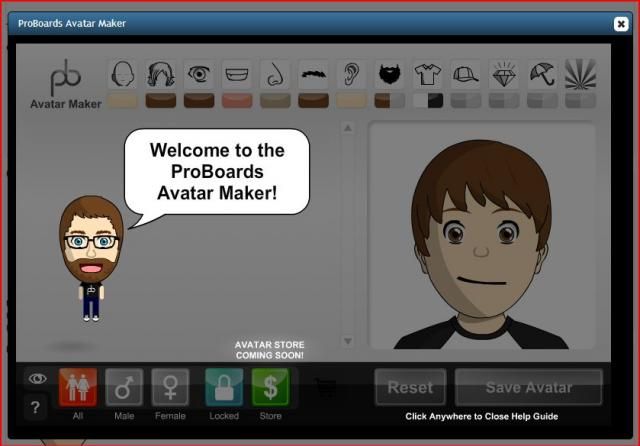 You can access help by clicking on the question mark in the lower left corner of the Avatar Maker. 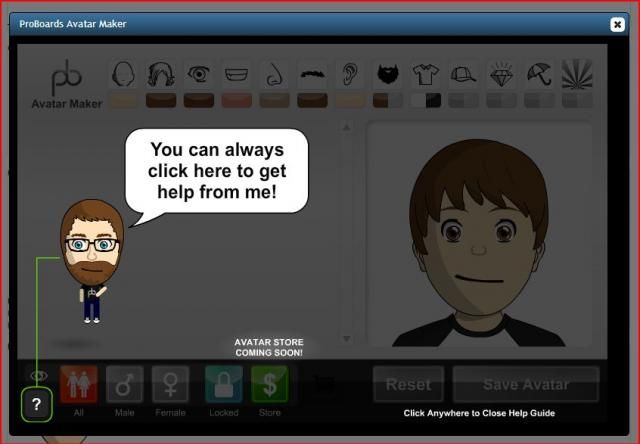 In the Tutorial, Ryan tells you about the features of the Avatar Maker and how to use them. To stop the Tutorial, click anywhere on the screen and you can start creating or editing your Avatar. After watching the Tutorial, you may begin choosing a head shape:  Once you have chosen the shape of the head, you may choose to change the skin color. 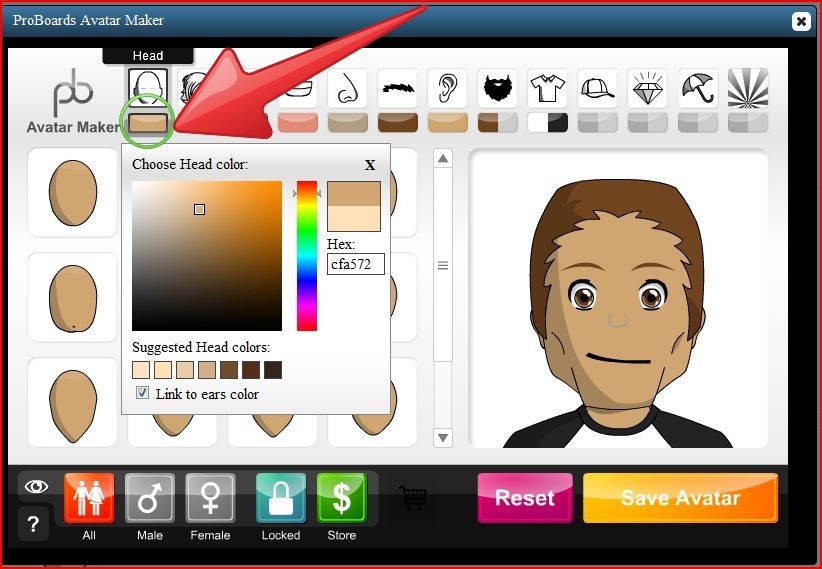 Next on the menu is hair. 1. Choose the hair style. 2. Choose the color. 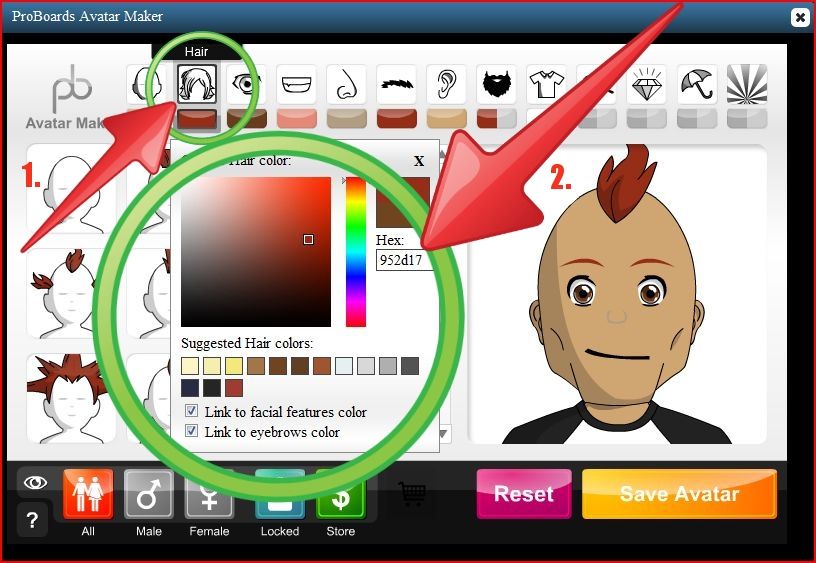 Save periodically to avoid loss of progress designing your Avatar. 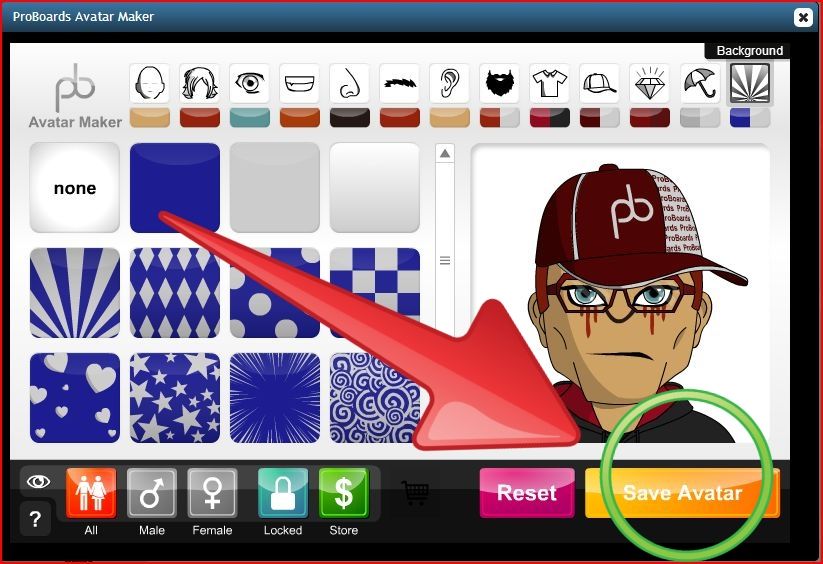 As you advance along the features, you may choose among types and shapes of eyes, mouths, noses, eyebrows, ears, facial features, clothing, hats, accessories, items, and backgrounds. Use the scroll bar to view the various options within a category. 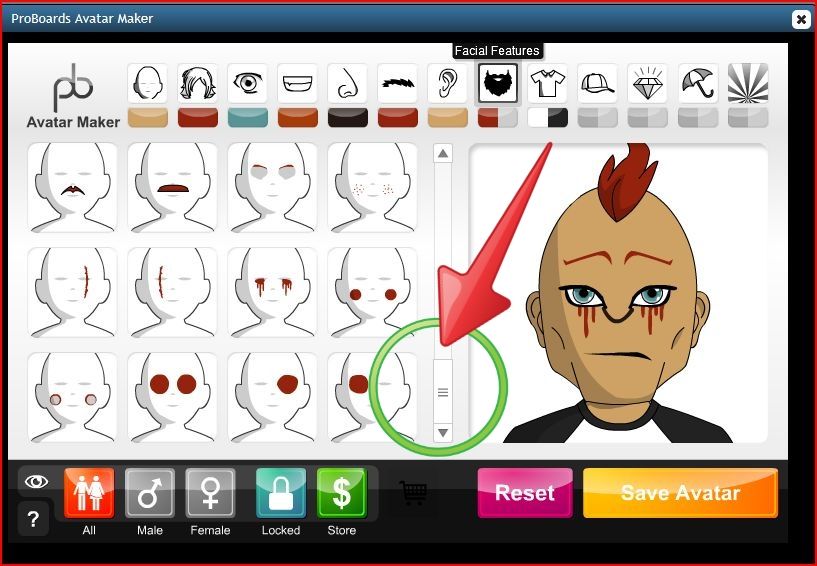 Two-tone options are available for facial features, clothing, hats, accessories, items, and background. Below is an example of two-tone clothing. For two different shades, select first one side of the shading bar below the clothing icon, then choose a shade from the color spectrum. Then to select the secondary color, click on the other side of the shaded bar below the clothing icon, and select a shade from the color spectrum. Use the same method to choose two-tone shading for the others as desired. 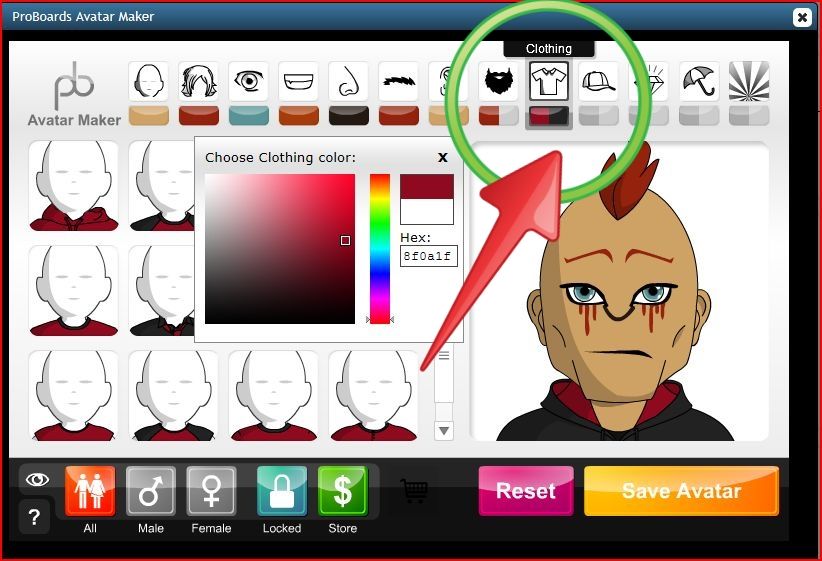 You may choose a background or leave it transparent. 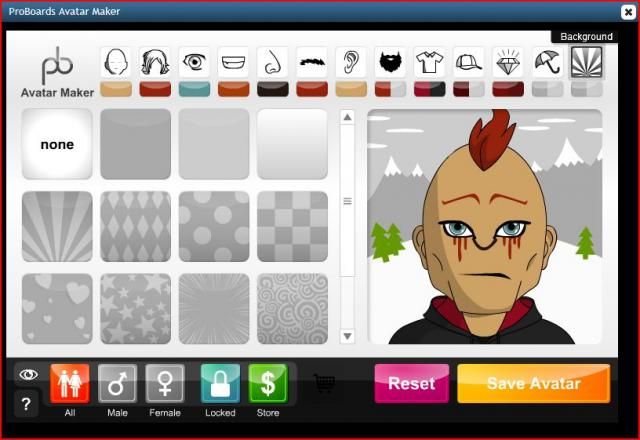 Before returning to your Profile page, be sure to click the gold-colored "Save Avatar" button. 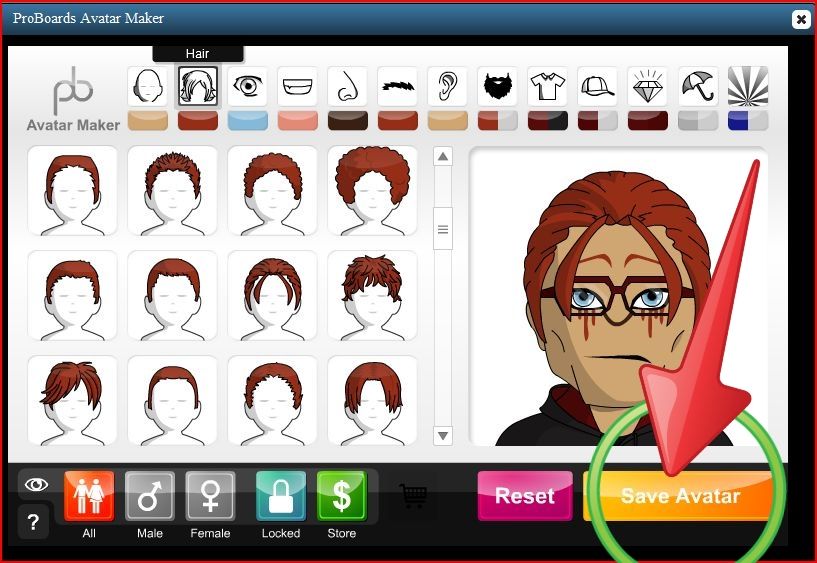 Finally, before leaving the Avatar tab in your Profile you will need click the "Save Avatar Changes" button to set your Avatar design. Save Avatar Changes 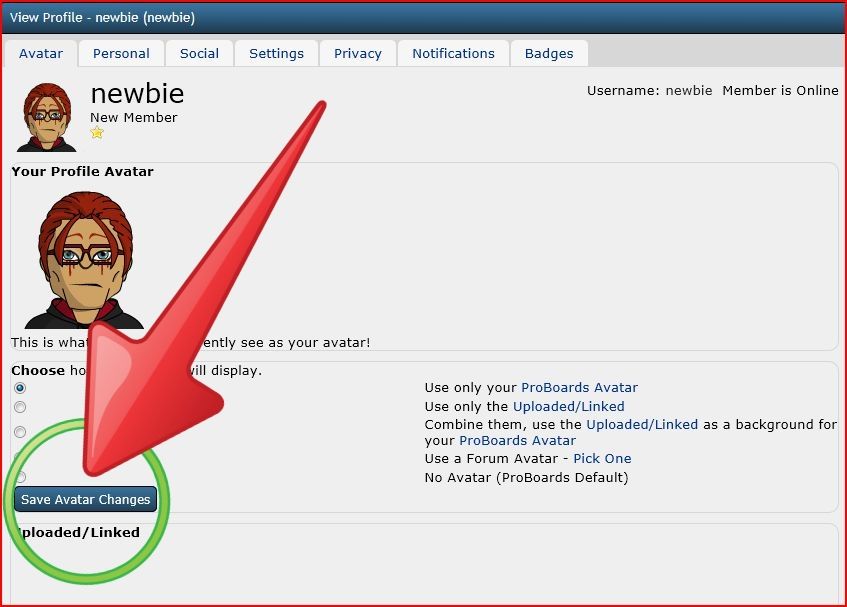 You may return at anytime to Edit your Avatar. |
|
|
|
Post by eagle on Mar 16, 2013 1:08:23 GMT -5
3. Combination of Uploaded Image as background for the ProBoards Avatar you design yourself
Profile>Edit Profile>Edit Avatar>Save Avatar > Combine them > Save Avatar Changes
To combine an Uploaded Image as the background for you ProBoards Avatar, it works best to make sure your ProBoards Avatar has a transparent background (or no background) before superimposing it onto the uploaded image. 1. Upload or Link your own avatar image. 2. Click the radio button for "Combine them...: 3. Save Avatar Changes 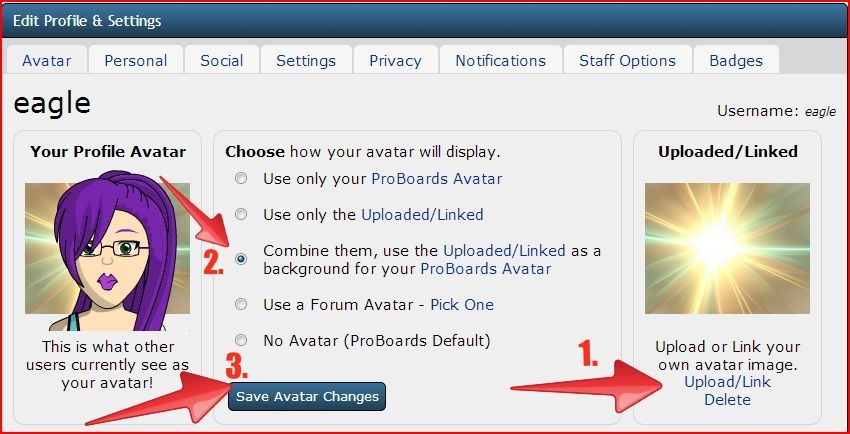 |
|
|
|
Post by eagle on Mar 16, 2013 1:27:17 GMT -5
4. Use a Forum Avatar
Profile>Edit Profile> Pick One (Forum Avatar) > Save Avatar Changes
To select a Forum Avatar, select Edit Profile, then turn on the button for "Use a Forum Avatar". Then Click on the hyperlinked "Pick One" 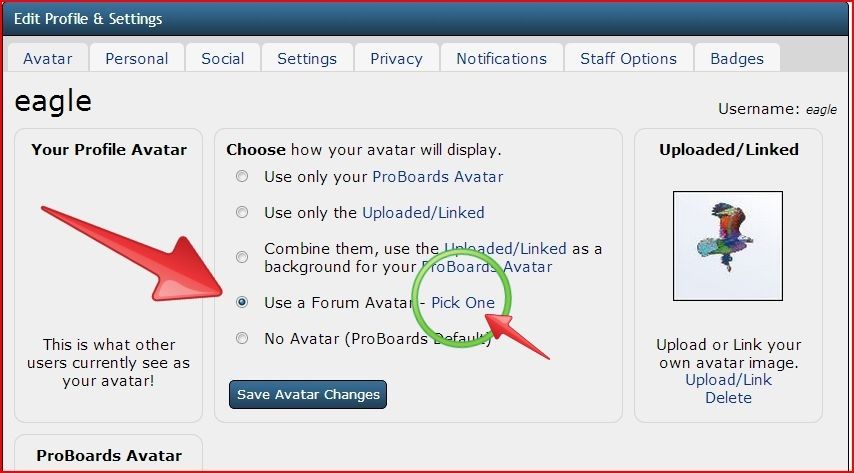 Choose one of the Avatars available from the menu box. 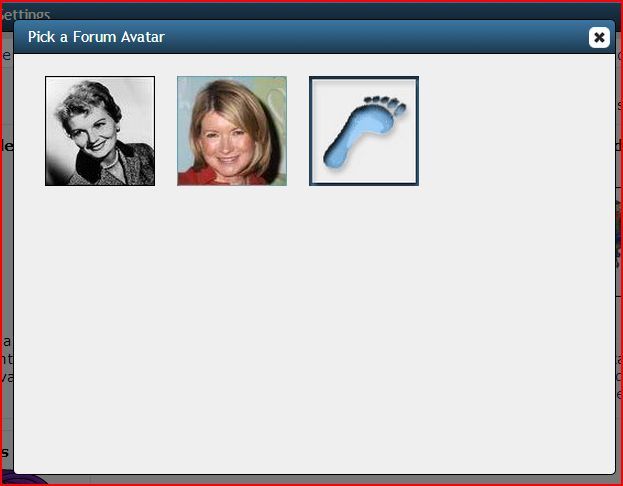 Once you have selected one of the Forum Avatars, you will be back on the Avatar Tab of the Edit Profile page. Be sure to Save Avatar Changes before leaving the page. |
|


